1934 Daimler 15 Saloon 6 Light
Howard Whatmough
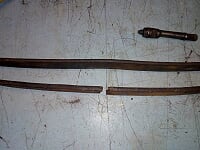
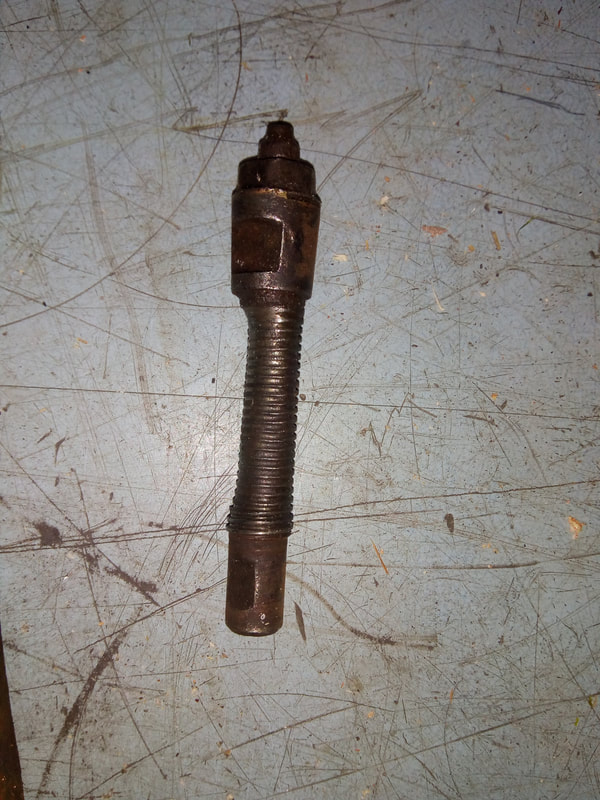
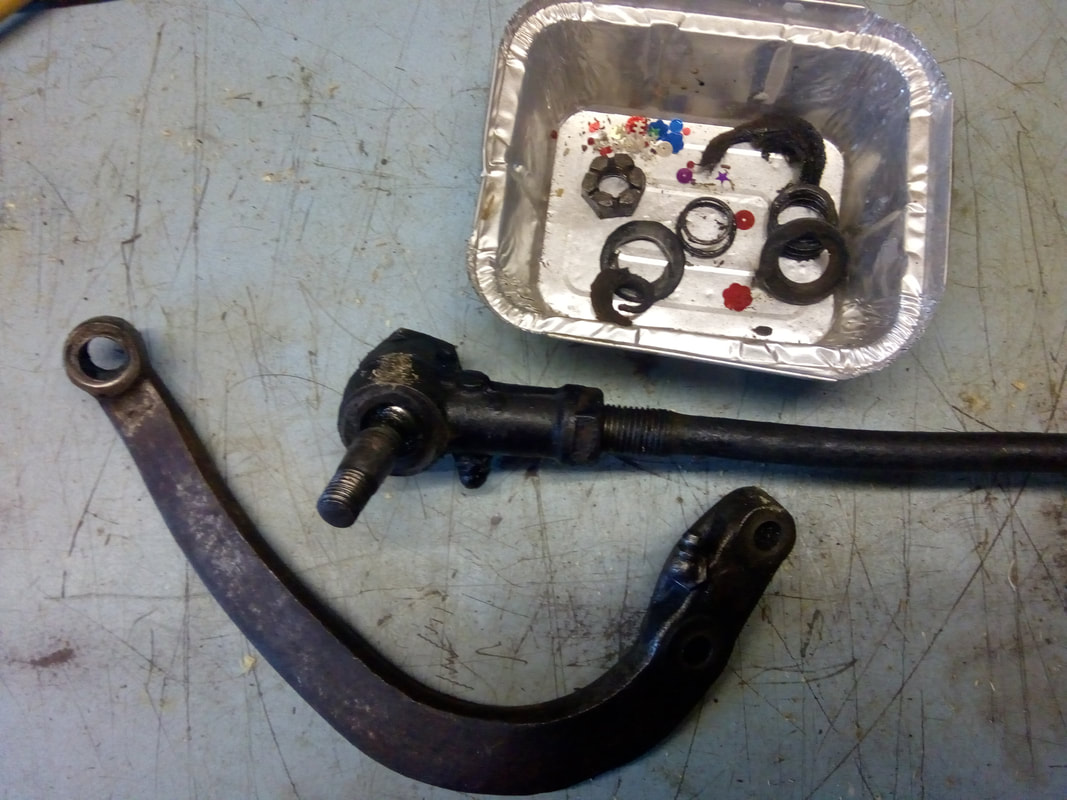
Secretary's Ramblings Dec20 Front Suspension Repair
Well here we are again, another month of lockdown gone and no doubt I, like a lot of you, have been working on the cars. I started my recent journey by replacing the king pins and bushes on the Daimler, but as usual when I moved to the offside, I noticed one of the leaf springs had broken. The spring had moved out a good three inches putting extra strain on the main spring, which had subsequently taken on a different shape. On taking the spring off I then found the spring bracket had a crack and the lubrication pin was very badly worn. While taking off all these parts I noticed the movement on the coupling on the track rod ends were well worn and not safe, so off they came. Taking all these parts off is one thing, finding replacements is quite a different story. I am at this moment in time still in the process of tracking down the parts. All I am saying is that these jobs needed doing before a total front wheel collapses, which in itself could turn out to be more than serious. (this reminds me of the old song “Three wheels on my wagon and I am still rolling along” ED.) When completed the car will probably steer in a straight line, or at least I am hoping so!! When you drive these old cars, you accept the idiosyncrasies and take them on board, when in fact you should be looking for and dealing with the issues. The front of the car should be good for quite a few years when I have completed the work. All I need now is to locate the parts, any suggestions?


Starting theDaimler After Engine Rebuild Summer 2018
A Stitch in Time, Howard Whatmough's Daimler 15
Engine Block
|
|
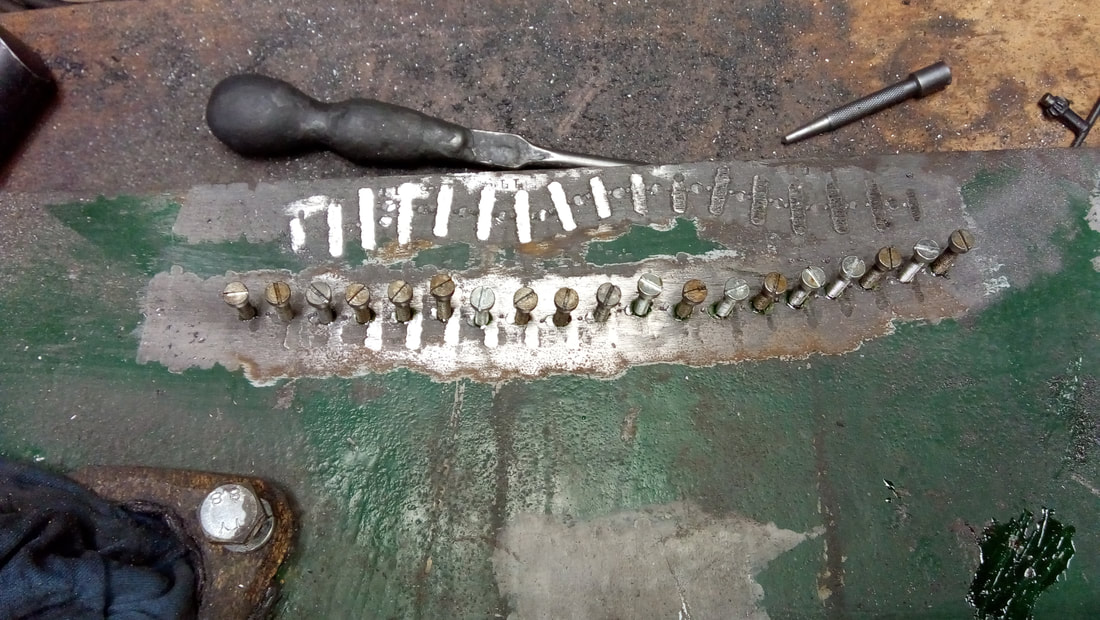
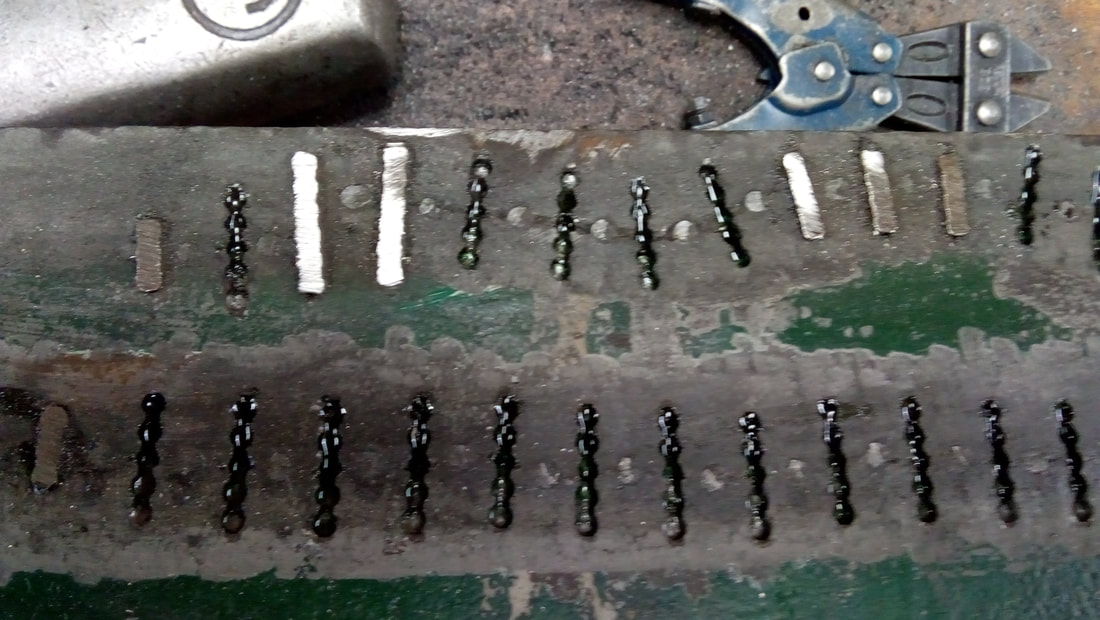
As most of you will be aware I am renovating the engine of the Daimler 15. Due to the knocking noise from within the engine, I decided it was time to investigate before a more serious issue arose. It turned out that the bush in the little end of chamber 5 had worn badly; hence the gudgeon pin was all but floating. This also caused damage to the bore, so a new sleeve is being inserted. A new bush has been made of steel for the little end so all is progressing well. While the engine was fully stripped I decided to have the hairline crack repaired in the engine block. It has been there for many years, but as there was only slight water leak, it did not pose a problem. However, as I am now using a waterless liquid which is very expensive and I do not wish to use a drip tray to catch the liquid into the foreseeable future, so something had to be done about the problem. I contacted a Mr Mike Powell from Halesowen who cold stitches engines. He came to where I garage the old car and I left him to carry on with the job. A friend and I stood and watched the whole process which was an experience in itself. A metal liquid was poured over the area, and then a magnet was used to draw the liquid to the crack. Using a template Mike drilled either side of the crack and with a chisel joined the holes. A cleat was then hammered into the stitch. Next Mike drilled and tapped either side of the cleat, then screwed in a bolt; this was then sheared off.
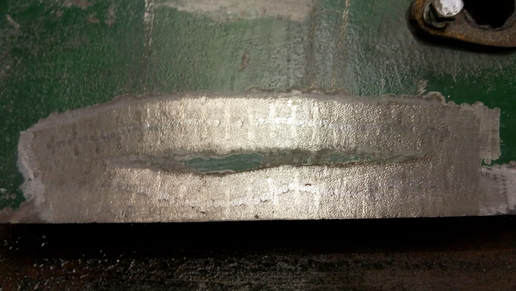
This process then secured the cleats and prevented them from coming back out. The whole area was then polished off leaving a very smooth finish, that when painted will not be noticeable. The time taken was just over four hours and cost £200, which in my opinion was very good value for money. All I need to do now is get all my bits back and put all together, fingers crossed I will remember where they all go.
Howard Whatmough motoring correspondent.
Daimler Engine An update on my Daimler engine following the cold stitching:- I eventually identified the source of the knocking noise. The little end bearing on number five piston was shot. A brass insert had flattened out, hence the gudgeon pin was rattling about. This allowed the gudgeon pin to float a resulting in gouge marks either side of the piston chamber. I have had the small end repaired with a steel inset and the chamber re-sleeved. All six chambers have been re-bored and new pistons and rings inserted. The engine has now been put back together and placed back in the car. All I have to do now is put all the other bit and pieces that fit around it back on. I have also had the head lights resilvered, so watch out for the dazzling lights when we eventually get back on the road. By Howard Whatmough
“News Flash” The engine has now been reinserted in the cradle, so I can now start putting all the other bits back on the car. Fingers crossed I can remember where they all go.
